How to Submit PDF Prints
We love large format prints! We print on really large paper, that's a heavier weight (no tissue!) And we print on a roll, so we can print any length of page, up to 36" wide.
We are only able to print copyshop and A0 sized files. Unfortunately, we cannot stitch together letter-sized pages into a large format pattern. Sometimes you can ask the designer can send you the large format version, if it didn't arrive with your initial pattern order.
Most patterns are 1-3 pages, though occasionally they are more. If you can't tell how many pages your file is, just guess and we can figure that out for you! If you purchase too few pages we will invoice you for the difference; if you purchase too many we will refund you the overage.
If a page is shorter or longer than 48", that's okay too! Any file with width up to 36" works. We may adjust your order total for pages that are much less or much more than 48" long.
Not sure what we are talking about? Here's our explainer for the difference between Copyshop (A0) and Print-At-Home (Letter-Sized) patterns.
To submit your patterns, follow our handy step-by-step guide:
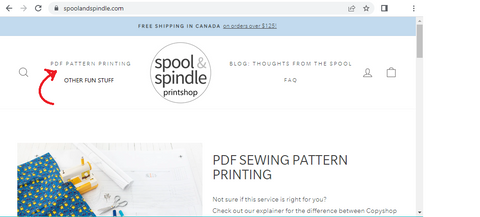
Step 1: Navigate to our Pattern Printing page (PDF Pattern Printing in the main menu).
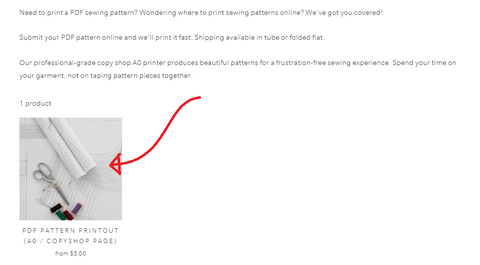
Step 2: Click on the PDF Printout listing.
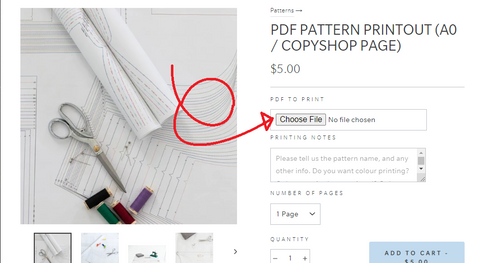
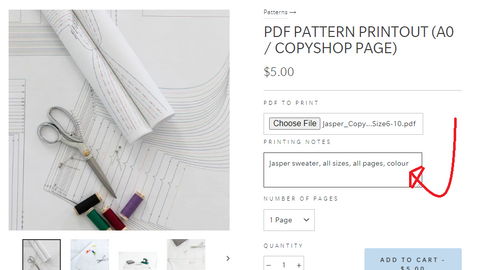
Step 3: Click Choose File, which will bring up a menu of options from your computer.
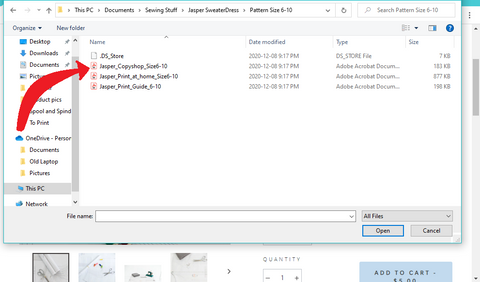
Step 4: Choose the file you want printed, and click "Open". Not sure which file? Choose a PDF file that says A0, Copyshop, Wide Format, Printshop, Large Format, or Arch E. Just upload one file per cart item. If you select a second file, it will replace the first.
Step 5: Let us know what we're printing! Include the pattern name and any printing instructions in the Printing Notes (e.g. black and white or colour printing, or if you only want specific size layers or pages printed).
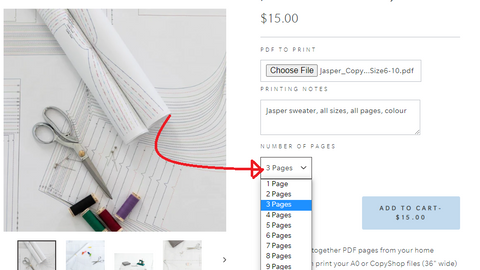
Step 6: Choose the number of pages your file is (not sure? No problem! We'll invoice you for any extra, or refund you if it's not as long as you thought).
Step 7: Choose how many copies of the print you want.
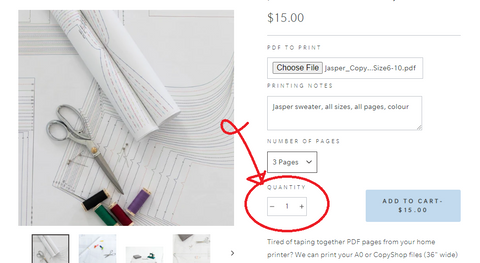
Step 8: Add to cart. This pattern is ready, and you can either close the cart and upload another pattern, or check out and pick your shipping method.
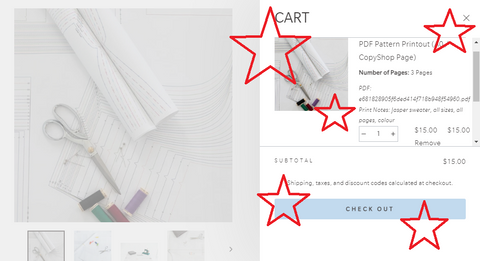
Step 9: Once you click Check Out, you can choose your shipping option.
For Kitchener pickup, choose "Pick up".
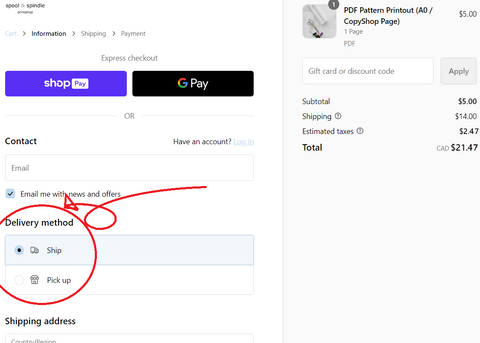
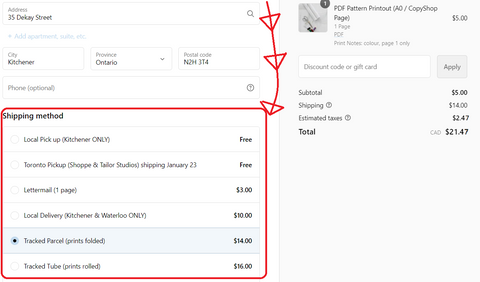
For all other options, including Toronto pickup, choose "Ship" and enter your address, then scroll down to see the shipping methods available in your area.
To ship your prints in a tracked package, we can fold them, or for a few dollars extra, we can roll them into a tube to limit creasing. Print orders containing only 1-3 pages can be shipped via lettermail (with no tracking) for a smaller fee.
And that's it! If we have any questions or if anything is missing, we will email you as soon as possible. Or if you placed your order and realized you need to change anything, just send us an email. We are friendly, I promise, and we love hearing from you!